
We typically deploy REST APIs behind a HAProxy reverse proxy. We often need to enforce SLAs and protect those APIs from being flooded with too many concurrent requests. In this post, I’ll show you a straightforward way to do this with HAProxy’s max_conn setting. Furthermore, I’ll show you how you can quickly verify your rate-limiting strategy.
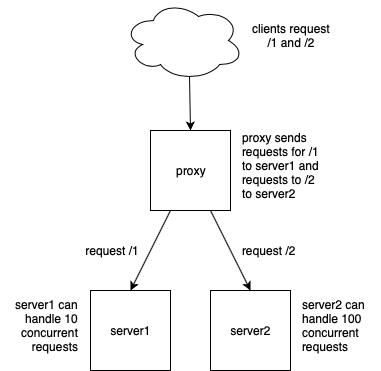
We’ll create a simple test-bed consisting of two REST API instances fronted by a HAProxy instance and we’ll flood them with requests using the ab tool (Apache benchmark – which generates an arbitrary number of concurrent requests to an API).
If a specific API gets too many concurrent requests, further requests will be rejected with a http 503 (service unavailable) and a message indicating that rate-limiting in effect.
HAProxy has various different ways to handle server overload – it can distribute the requests to another server (if you have multiple servers configured in a backend) or it can queue the requests for later processing. However, both these approaches have their own issues (multiple servers don’t help if you have a shared resource like a database which is also being overloaded) and queuing requests is problematic since if the client is generating requests at a higher rate than the server(s) can handle them, the queue will just keep growing.
We’ll create this scenario as a stack of docker containers (I’m using a server docker-test – it should work equally well on any machine which can run docker). First off, we’ll need to create two servers to handle requests to resource /1 and /2. Since what we want to do is rate limiting, we’ll have the server display the number of concurrent requests its handling. We’ll use python and the flask framework to create a REST API (because nothing is easier than python).
Here’s our server – main.py – it handles a single request, sleeps for a second and then returns an OK message. We have it sleep to simulate a slow request which might overload a server with concurrent requests. We use waitress as server because it conveniently displays the maximum number of concurrent requests it’s handling.
main.py:
from waitress import serve
from flask import Flask
import time
import logging
import socket

log = logging.getLogger('werkzeug')
log.setLevel(logging.ERROR)

app = Flask(__name__)


@app.route("/")
def hello():
    time.sleep(1)
    return "OK (from {})".format(socket.gethostname())


host = "0.0.0.0"
port = 8080

serve(app, host=host, port=port)
Next we need a Dockerfile to build the server docker image:
Dockerfile:
FROM python:3.6
LABEL author="roger@armstrongconsulting.net"

WORKDIR /

COPY main.py .

RUN apt-get -qq update
RUN pip install --upgrade pip
RUN apt-get -qq install apt-utils libpq-dev python-dev -y
RUN pip install flask waitress

EXPOSE 8080
ENTRYPOINT ["python"]
CMD ["main.py"]
Ok, so that’s our server image – we’ll later create two containers from that image: server1 and server2. But first we’ll need our proxy. This time we’ll use a standard docker image haproxy:1.9 (the latest haproxy version at the time of writing this post).
We’ll need to provide a haproxy.cfg config file and a custom 503 message to explain to the client that rate limiting is in effect (otherwise he might interpret a 503 status as simply server unavailable).
haproxy.cfg:
global
        daemon
	log stdout format raw local0 debug
	maxconn 1000 # only 1000 requests to be processed simultaneously

defaults
        mode http
	log global
	option httplog
        timeout connect 5s
        timeout client  50s
        timeout server  50s
	default-server init-addr none # this allows haproxy to start with unresolved dns entries

resolvers docker_resolver
	nameserver dns 127.0.0.11:53 # instruct haproxy to use docker's resolver

listen stats
        bind :1936
        mode http
        stats enable
        stats realm Haproxy\ Statistics
        stats uri /

backend rest_server_1
        reqrep ^([^\ ]*)\ /1/(.*)     \1\ /\2
	option httpchk GET /
        option forwardfor except 127.0.0.1
        errorfile 503 /usr/local/etc/haproxy/ratelimit.json.http
        server rest_server_1 rest_server_1:8080 maxconn 10 check inter 10s resolvers docker_resolver resolve-prefer ipv4

backend rest_server_2
        reqrep ^([^\ ]*)\ /2/(.*)     \1\ /\2
	option httpchk GET /
        option forwardfor except 127.0.0.1
        errorfile 503 /usr/local/etc/haproxy/ratelimit.json.http
        server rest_server_2 rest_server_2:8080 maxconn 100 check inter 10s resolvers docker_resolver resolve-prefer ipv4

frontend main
        mode    http
        bind    :80

        capture request header X-Forwarded-For len 15
        capture request header content-length len 15
        capture request header user-agent len 64
        capture request header host len 64

        acl path_1 path_beg /1
        use_backend rest_server_1 if path_1

        acl path_2 path_beg /2
        use_backend rest_server_2 if path_2
The haproxy.cfg file above is pretty standard for a simple REST API – it has one frontend (handling http port 80 – we’re ignoring SSL for simplicity) and, based on the path (/1 or /2), we’re routing each requests to one of two backends. Each backend only has one server (i.e. no load balancing, again for simplicity), but one backend limits the rate of concurrent requests to 10 and the other to 100 (using max_conn). Additionally, the backends define a custom message for 503 (which is what will occur when max_conn is exceeded).
Now our custom 503 status message:
ratelimit.json.http:
HTTP/1.1 503 Service Unavailable
Cache-Control: no-cache
Connection: close
Content-Length: 51
Content-Type: application/json

{"code":"503", "message":"API rate limit exceeded"}
Now all we need is a docker-compose.yml file to build our server image and bring up our stack of containers:
docker-compose.yml
version: "3"

services:
  proxy1:
    image: haproxy:1.9
    container_name: proxy
    ports:
     - "8085:80"
     - "1936:1936"
    volumes:
     - /home/administrator/api-rate-limiting/proxy:/usr/local/etc/haproxy:ro
    restart: always

  rest_server_1:
    build: server
    container_name: rest_server_1
    restart: always
    ports:
      - 8098:8080

  rest_server_2:
    build: server
    container_name: rest_server_2
    restart: always
    ports:
      - 8099:8080
Our directory structure looks like this:
administrator@docker-test:~/api-rate-limiting$ tree
|-- docker-compose.yml
|-- proxy
|   |-- haproxy.cfg
|   `-- ratelimit.json.http
|-- server
    |-- Dockerfile
    `-- main.py
Bring up the stack with docker-compose:
administrator@docker-test:~/api-rate-limiting$ docker-compose up -d
Building rest_server_1
Step 1/11 : FROM python:3.6
 ---> 5281251bf064
Step 2/11 : LABEL author="roger@armstrongconsulting.net"
 ---> Using cache
 ---> a22038738de6
Step 3/11 : WORKDIR /
 ---> Using cache
 ---> 402fb3c1ce2f
Step 4/11 : COPY main.py .
 ---> Using cache
 ---> 112d8ed884db
Step 5/11 : RUN apt-get -qq update
 ---> Running in eded3a64de3a
Removing intermediate container eded3a64de3a
 ---> d14c4f3b1e8b
Step 6/11 : RUN pip install --upgrade pip
 ---> Running in d084cc91552b
Collecting pip
  Downloading https://files.pythonhosted.org/packages/5c/e0/be401c003291b56efc55aeba6a80ab790d3d4cece2778288d65323009420/pip-19.1.1-py2.py3-none-any.whl (1.4MB)
Installing collected packages: pip
  Found existing installation: pip 19.1
    Uninstalling pip-19.1:
      Successfully uninstalled pip-19.1
Successfully installed pip-19.1.1
Removing intermediate container d084cc91552b
 ---> 8e173724eaac
Step 7/11 : RUN apt-get -qq install apt-utils libpq-dev python-dev -y
 ---> Running in a855384f7ec3
debconf: delaying package configuration, since apt-utils is not installed
Selecting previously unselected package libapt-inst2.0:amd64.
(Reading database ... 30553 files and directories currently installed.)
Preparing to unpack .../0-libapt-inst2.0_1.4.9_amd64.deb ...
Unpacking libapt-inst2.0:amd64 (1.4.9) ...
Selecting previously unselected package apt-utils.
Preparing to unpack .../1-apt-utils_1.4.9_amd64.deb ...
Unpacking apt-utils (1.4.9) ...
Preparing to unpack .../2-libpq-dev_9.6.13-0+deb9u1_amd64.deb ...
Unpacking libpq-dev (9.6.13-0+deb9u1) over (9.6.11-0+deb9u1) ...
Preparing to unpack .../3-libpq5_9.6.13-0+deb9u1_amd64.deb ...
Unpacking libpq5:amd64 (9.6.13-0+deb9u1) over (9.6.11-0+deb9u1) ...
Selecting previously unselected package libpython2.7:amd64.
Preparing to unpack .../4-libpython2.7_2.7.13-2+deb9u3_amd64.deb ...
Unpacking libpython2.7:amd64 (2.7.13-2+deb9u3) ...
Selecting previously unselected package libpython2.7-dev:amd64.
Preparing to unpack .../5-libpython2.7-dev_2.7.13-2+deb9u3_amd64.deb ...
Unpacking libpython2.7-dev:amd64 (2.7.13-2+deb9u3) ...
Selecting previously unselected package libpython-dev:amd64.
Preparing to unpack .../6-libpython-dev_2.7.13-2_amd64.deb ...
Unpacking libpython-dev:amd64 (2.7.13-2) ...
Selecting previously unselected package python2.7-dev.
Preparing to unpack .../7-python2.7-dev_2.7.13-2+deb9u3_amd64.deb ...
Unpacking python2.7-dev (2.7.13-2+deb9u3) ...
Selecting previously unselected package python-dev.
Preparing to unpack .../8-python-dev_2.7.13-2_amd64.deb ...
Unpacking python-dev (2.7.13-2) ...
Setting up libapt-inst2.0:amd64 (1.4.9) ...
Setting up apt-utils (1.4.9) ...
Setting up libpq5:amd64 (9.6.13-0+deb9u1) ...
Processing triggers for libc-bin (2.24-11+deb9u4) ...
Setting up libpython2.7:amd64 (2.7.13-2+deb9u3) ...
Setting up libpython2.7-dev:amd64 (2.7.13-2+deb9u3) ...
Setting up python2.7-dev (2.7.13-2+deb9u3) ...
Setting up libpython-dev:amd64 (2.7.13-2) ...
Setting up libpq-dev (9.6.13-0+deb9u1) ...
Setting up python-dev (2.7.13-2) ...
Processing triggers for libc-bin (2.24-11+deb9u4) ...
Removing intermediate container a855384f7ec3
 ---> 808ed3add0e6
Step 8/11 : RUN pip install flask waitress
 ---> Running in 27523baf6b88
Collecting flask
  Downloading https://files.pythonhosted.org/packages/7f/e7/08578774ed4536d3242b14dacb4696386634607af824ea997202cd0edb4b/Flask-1.0.2-py2.py3-none-any.whl (91kB)
Collecting waitress
  Downloading https://files.pythonhosted.org/packages/41/e0/366785e4b9b4d212df4c3b084153bf7f5e5ab355928f5465144e5fc98494/waitress-1.3.0-py2.py3-none-any.whl (141kB)
Collecting itsdangerous>=0.24 (from flask)
  Downloading https://files.pythonhosted.org/packages/76/ae/44b03b253d6fade317f32c24d100b3b35c2239807046a4c953c7b89fa49e/itsdangerous-1.1.0-py2.py3-none-any.whl
Collecting click>=5.1 (from flask)
  Downloading https://files.pythonhosted.org/packages/fa/37/45185cb5abbc30d7257104c434fe0b07e5a195a6847506c074527aa599ec/Click-7.0-py2.py3-none-any.whl (81kB)
Collecting Werkzeug>=0.14 (from flask)
  Downloading https://files.pythonhosted.org/packages/9f/57/92a497e38161ce40606c27a86759c6b92dd34fcdb33f64171ec559257c02/Werkzeug-0.15.4-py2.py3-none-any.whl (327kB)
Collecting Jinja2>=2.10 (from flask)
  Downloading https://files.pythonhosted.org/packages/1d/e7/fd8b501e7a6dfe492a433deb7b9d833d39ca74916fa8bc63dd1a4947a671/Jinja2-2.10.1-py2.py3-none-any.whl (124kB)
Collecting MarkupSafe>=0.23 (from Jinja2>=2.10->flask)
  Downloading https://files.pythonhosted.org/packages/b2/5f/23e0023be6bb885d00ffbefad2942bc51a620328ee910f64abe5a8d18dd1/MarkupSafe-1.1.1-cp36-cp36m-manylinux1_x86_64.whl
Installing collected packages: itsdangerous, click, Werkzeug, MarkupSafe, Jinja2, flask, waitress
Successfully installed Jinja2-2.10.1 MarkupSafe-1.1.1 Werkzeug-0.15.4 click-7.0 flask-1.0.2 itsdangerous-1.1.0 waitress-1.3.0
Removing intermediate container 27523baf6b88
 ---> 86ada416f10e
Step 9/11 : EXPOSE 8080
 ---> Running in 331db76bf305
Removing intermediate container 331db76bf305
 ---> f93198ba9634
Step 10/11 : ENTRYPOINT ["python"]
 ---> Running in 25993abb6ab5
Removing intermediate container 25993abb6ab5
 ---> ba70605a987f
Step 11/11 : CMD ["main.py"]
 ---> Running in 465ebf66d6ac
Removing intermediate container 465ebf66d6ac
 ---> ef73d18575b1
Successfully built ef73d18575b1
Successfully tagged api-rate-limiting_rest_server_1:latest
WARNING: Image for service rest_server_1 was built because it did not already exist. To rebuild this image you must use `docker-compose build` or `docker-compose up --build`.
Building rest_server_2
Step 1/11 : FROM python:3.6
 ---> 5281251bf064
Step 2/11 : LABEL author="roger@armstrongconsulting.net"
 ---> Using cache
 ---> a22038738de6
Step 3/11 : WORKDIR /
 ---> Using cache
 ---> 402fb3c1ce2f
Step 4/11 : COPY main.py .
 ---> Using cache
 ---> 112d8ed884db
Step 5/11 : RUN apt-get -qq update
 ---> Using cache
 ---> d14c4f3b1e8b
Step 6/11 : RUN pip install --upgrade pip
 ---> Using cache
 ---> 8e173724eaac
Step 7/11 : RUN apt-get -qq install apt-utils libpq-dev python-dev -y
 ---> Using cache
 ---> 808ed3add0e6
Step 8/11 : RUN pip install flask waitress
 ---> Using cache
 ---> 86ada416f10e
Step 9/11 : EXPOSE 8080
 ---> Using cache
 ---> f93198ba9634
Step 10/11 : ENTRYPOINT ["python"]
 ---> Using cache
 ---> ba70605a987f
Step 11/11 : CMD ["main.py"]
 ---> Using cache
 ---> ef73d18575b1
Successfully built ef73d18575b1
Successfully tagged api-rate-limiting_rest_server_2:latest
WARNING: Image for service rest_server_2 was built because it did not already exist. To rebuild this image you must use `docker-compose build` or `docker-compose up --build`.
Creating rest_server_2 ... done
Creating proxy         ... done
Creating rest_server_1 ... done
We can try out our two servers from a browser at http://docker-test:8085/1/ and http://docker-test:8085/2/
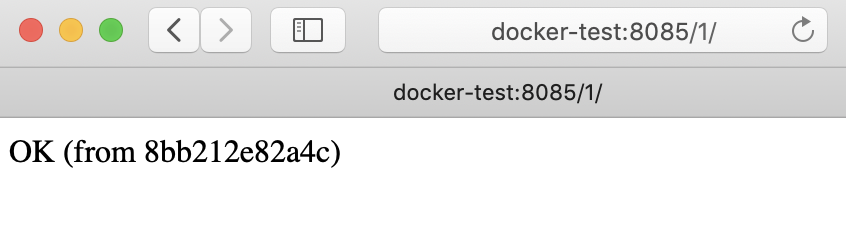
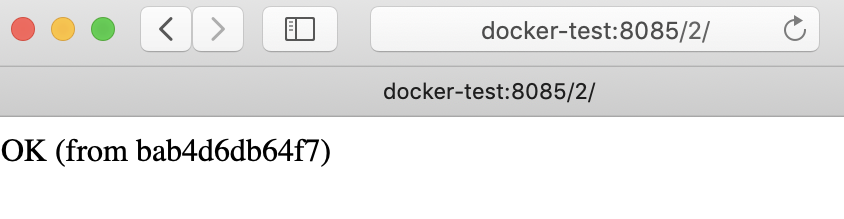
Note: The weird string in the message is just the docker container hostname (which is automatically generated by docker).
Now comes the interesting part. We’ll use the ab tool (Apache benchmark) to load up the servers with requests and we’ll observe the api rate-limiting in effect.
From a terminal, issue the ab command to fire off 1000 requests to server1 with a concurrency of 300. That means that the client is sending far more concurrent requests than server 1 wants to handle (remember it has a 1 second delay processing each request), so we’ll expect most of the requests to fail with a 503 status and the message “API rate limit exceeded”.
rogersmac:~ roger$ ab -v 2 -n 10000 -c 300 http://docker-test:8085/1/
This is ApacheBench, Version 2.3 <$Revision: 1826891 $>
Copyright 1996 Adam Twiss, Zeus Technology Ltd, http://www.zeustech.net/
Licensed to The Apache Software Foundation, http://www.apache.org/

Benchmarking docker-test (be patient)
INFO: GET header ==
---
GET /1/ HTTP/1.0
Host: docker-test:8085
User-Agent: ApacheBench/2.3
Accept: */*


---
LOG: header received:
HTTP/1.0 200 OK
Content-Length: 22
Content-Type: text/html; charset=utf-8
Date: Thu, 16 May 2019 09:14:01 GMT
Server: waitress

OK (from 6070f98328c5)
...
So far so, good, but pretty soon you’ll start seeing:
{"code":"503", "message":"API rate limit exceeded"}
WARNING: Response code not 2xx (503)
LOG: header received:
HTTP/1.1 503 Service Unavailable
Cache-Control: no-cache
Connection: close
Content-Length: 51
Content-Type: application/json
Meanwhile, if we view the log of server1, we’ll see how many simultaneous requests the server is handling:
administrator@docker-test:~/api-rate-limiting$ docker logs -f rest_server_1
WARNING:waitress.queue:Task queue depth is 1
WARNING:waitress.queue:Task queue depth is 2
WARNING:waitress.queue:Task queue depth is 3
WARNING:waitress.queue:Task queue depth is 4
WARNING:waitress.queue:Task queue depth is 5
WARNING:waitress.queue:Task queue depth is 6
WARNING:waitress.queue:Task queue depth is 3
WARNING:waitress.queue:Task queue depth is 4
WARNING:waitress.queue:Task queue depth is 5
WARNING:waitress.queue:Task queue depth is 6
WARNING:waitress.queue:Task queue depth is 7
WARNING:waitress.queue:Task queue depth is 4
WARNING:waitress.queue:Task queue depth is 5
WARNING:waitress.queue:Task queue depth is 6
WARNING:waitress.queue:Task queue depth is 7
The waitress Task queue depth never exceeds 7 – the proxy server is successfully limiting the api rate.
Doing the same thing on server_2, we see that there that the Task queue depth never exceeds 94 – again the proxy is doing a good job of limiting the api rate (to 100 concurrent api calls this time).
rogersmac:~ roger$ ab -v 2 -n 10000 -c 300 http://docker-test:8085/2/administrator@docker-test:~/api-rate-limiting$ docker logs -f rest_server_2
...
WARNING:waitress.queue:Task queue depth is 84
WARNING:waitress.queue:Task queue depth is 85
WARNING:waitress.queue:Task queue depth is 86
WARNING:waitress.queue:Task queue depth is 87
WARNING:waitress.queue:Task queue depth is 88
WARNING:waitress.queue:Task queue depth is 89
WARNING:waitress.queue:Task queue depth is 90
WARNING:waitress.queue:Task queue depth is 91
WARNING:waitress.queue:Task queue depth is 92
WARNING:waitress.queue:Task queue depth is 93
WARNING:waitress.queue:Task queue depth is 94
WARNING:waitress.queue:Task queue depth is 92
WARNING:waitress.queue:Task queue depth is 92
WARNING:waitress.queue:Task queue depth is 93
WARNING:waitress.queue:Task queue depth is 94Conclusion
When you create production APIs, you need to protect your servers from too many concurrent API calls, otherwise, sooner or later your servers will grind to a halt. HAProxy provides many different mechanisms for load balancing and rate limiting. This post shows you how to easily verify one of those configurations before deploying it in production. The standard tools used in this post (HAProxy, docker, ab and python) allow you to quickly demonstrate and verify your API rate-limiting strategy.